


The Battle of Beersheba
On 31 October 1917, the heavily fortified town of Beersheba was the scene of a historic charge by the men of the 4th Australian Light Horse Brigade.
Commencing at dusk, the brigade stormed the town, using their bayonets as swords in a highly unconventional charge. The momentum of the surprise attack carried them through the Turkish defences where they were able to secure the town before it could be destroyed by the retreating Turkish force.
Commemorations across Queensland
Queensland communities hosted many special events and activities to commemorate the 100 year anniversary of the Australian Light Horse’s daring charge at Beersheba. Discover the exciting commemorations held in partnership with Queensland Mounted Infantry Historical Troop, Australian Outback Spectacular and more.
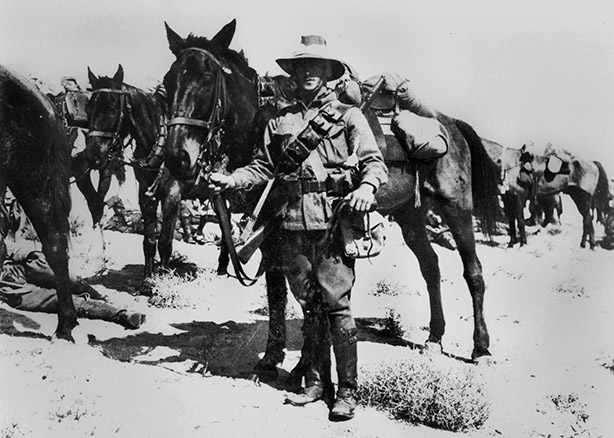
Member of the Australian 2nd Light Horse on active duty in the Middle East ca. 1917 (Image courtesy of State Library of Queensland)
The background to Beersheba
The charge of Beersheba by the Australian Light Horse took place on 31 October 1917, during the third Battle of Gaza in Palestine. It was a vital component of the allied forces’ campaign to secure the Sinai Peninsula and ensure the shipping corridors along the Suez Canal remained open to Britain and its allies.
The commanders of the allied forces turned their focus to Beersheba, a town at the end of the Turkish defensive line. Although the majority of the Turkish forces were stationed in Gaza, the 1000 Turkish rifleman in Beersheba had strong defensive positions and were supported by nine machine guns and two aircraft.
To maintain the element of surprise, the 40,000-strong Desert Mounted Corps made the dusty 43km-trek toward Beersheba under the cover of darkness on 30 October 1917. They attacked at dawn the following day, starting with an offensive at Sakati to close the road and halt Turkish reinforcements. The troops then progressed to Tel El Saba, 3km east of Beersheba, but were met with fierce resistance from the Turkish forces.
The Desert Mounted Corps captured Tel El Saba by mid-afternoon, however this left few hours of daylight for the assault on Beersheba. They had to take this town before nightfall, as its wells were the only source of water available in the region and the troops had not resupplied in several days.
An unconventional approach
Lieutenant General Sir Harry Chauvel put the challenge to Brigadier General William Grant’s 4th Australian Light Horse Brigade.
The traditional strategy for the Light Horse—to dismount and attack with rifles from a distance—would leave the men vulnerable to shrapnel fire on the open plains surrounding Beersheba. General Grant devised a different approach; they would attack like a cavalry unit, bayonets in hand like sabres.
The charge, which commenced around 5pm, caught the Turkish gunners off guard. They had little time to recalibrate their weapons for close range battle, and could largely only fire shrapnel over the charging horsemen’s heads.
While the 4th Regiment dismounted at the trenches to confront the awed enemy (ultimately taking over 700 prisoners), the 12th Regiment further surprised the Turks by continuing their furious charge over the trenches and straight on to the town, capturing it before the Turkish forces could regroup or destroy the wells in a retreat.
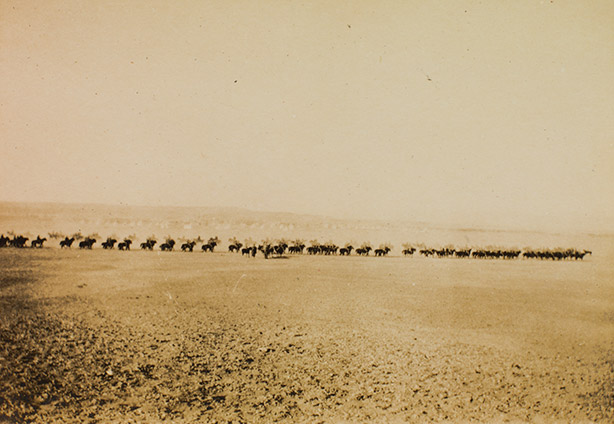
A line of mounted Light Horse troops on manoeuvres in Heliopolis, Cairo, Egypt in 1915. (Image courtesy of State Library of Queensland)
A historic success
The unconventional approach was a success—the town and its wells were secured, providing the 60,000 allied troops with access to the region’s only dependable source of water. However, 31 men from the Light Horse lost their lives and an additional 36 were wounded. At least 70 horses also died during the charge.
The occupation of Beersheba was the beginning of the end for the Turkish defensive line. The allied forces were soon able to outflank the forces in Gaza, and the Turkish resistance in the long contested city collapsed within the week.
Fast facts
- Many of the Light Horse men involved in the Battle of Beersheba had already proven themselves on the beaches at Gallipoli, although without their beloved horses.
- Only two of the 4th Light Horse’s three regiments—the 4th from Victoria, and the 12th from New South Wales—would charge the Turkish position. The 11th Regiment, on detached duty at the time, was ordered to saddle up and follow into Beersheba when ready.
- The 11th regiment was largely formed in Queensland, with one squadron coming from South Australia.
- Queenslander Trooper Thomas O'Leary, of the 4th Light Horse regiment, raced ahead of his unit into Beersheba to capture 30 Ottoman Turkish soldiers single handed, and then assisted in the capture of a field gun. He was awarded the Military Medal for these actions.
- About 800 men and horses made up the 4th Australian Light Horse Brigade.
- Over 1000 Turkish prisoners were taken.
- 31 men from the Light Horse were killed, 36 were wounded, 70 horses killed with over 60 wounded.
- The British lost 171 troops killed in action earlier in the day attempting to take Beersheba.
- Ottoman casualties are believed to be about 1000 (killed and wounded).
- The success of this charge allowed approx 60,000 allied troops access to water.
- By 10 pm on 31 October, approximately 58,000 light horsemen and 100,000 animals had swarmed into Beersheba. It took 1,800,000 litres of water to shed their battle thirst.
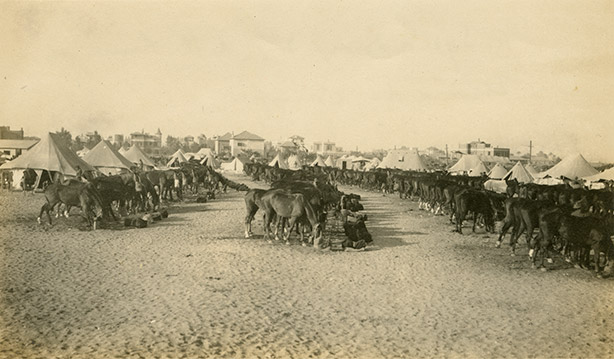
2nd Australian Light Horse camp and horse lines at Maadi Egypt during the First World War, December 1914 (Image courtesy of State Library of Queensland)
Useful links
- A detailed account of the Battle of Beersheba by the Australian War Memorial
- The Australian Imperial Force in Sinai and Palestine, 1914–1918 (10th edition, 1941) by Henry Somer (Harry) Gullett, Australian War Memorial
- The story of Edward Randolph Cleaver, 4th Australian Light Horse Regiment via Australian War Memorial
- The story of Major George Herbert Bourne, B Squadron, 2nd Light Horse Regiment via the State Library of Queensland
- National Geographic documentary excerpts on Australian war horses


